 |
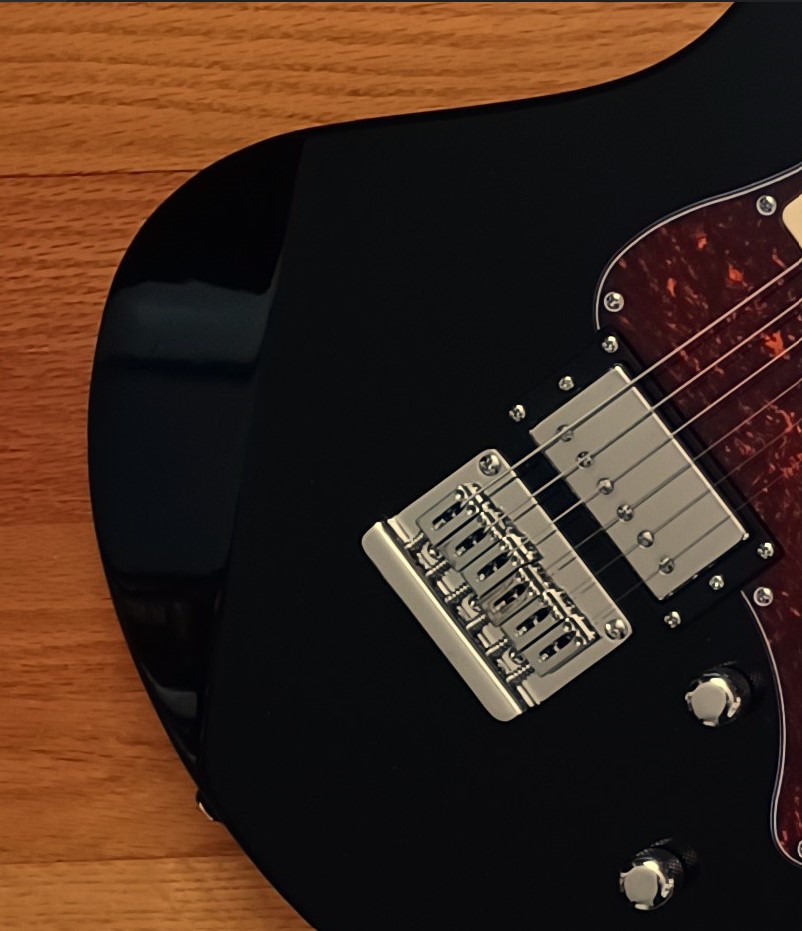
| Figure 1a. Yamaha Pacifica PAC311H |
 |
| Figure 1b. Yamaha Pacifica PAC311H |
I’ve been wanting to try one of these for a few years now, but I’ve been nervous about two things:
The unusual pickup combination looks weird. It doesn’t bother me, but I was worried that it would after I’ve had it a while, if that makes sense. It seems like that would be the first thing I would get sick of. I love the idea of HS guitars (I have no use for a middle pickup), so I figured I could probably live with it.
I’ve also been worried about the resale value, in case I ever decide I don’t like it and want to sell it. I have sold many guitars over the years – sometimes I do OK, sometimes I take a bit of a hit, but I usually won’t buy something if I don’t think I can sell it without taking too much of a hit.
I found it on sale on Reverb recently, so I got it for a price I can live with (Manchester Music Mill shipped incredibly fast, the guitar was very well packed, they sent tracking info, they posted feedback right away – the transaction could not have gone better, so props to them).
A quick note: I got the PAC311 instead of the PAC611 for a few reasons:
- I prefer unfinished/satin necks (the 600 series have a gloss finish).
- I prefer natural headstocks (the 600 series have matching headstocks).
- I figured that the main difference between the two series besides the finish are that the 611s have Seymour Duncans, but I can swap those out with pickups of my choosing, and for less money than the cost difference between the two series.
Anyway, here’s my take, for what it’s worth:
Acoustically pretty decent. Some guitars sound great unplugged, some don’t. Wouldn’t be dealbreaker by any means, but I do play unplugged a lot, so it’s nice bonus that it sounds good unplugged.
The electronics are cheap, but good enough (Figure 2). I would say the stock pickups (G&B – budget pickups made in South Korea, same pickup brand that is in my PRS S2 Standard) are slightly lacking (Figure 3). It might be because I prefer hotter pickups, or it might be because they are lacking. But for my purposes, I don’t need to change anything. I will probably swap in a couple of different pickups for the hell of it, but because I enjoy doing that, not because I have a major problem with the stock pickups. (I actually didn’t remove the neck pickup, so I am only assuming that it’s also a G&B.)
 |
| Figure 2. Cheap but serviceable electronics |
 |
| Figure 3. G&B pickup |
The fret ends needed attention, but it’s pretty dry this time of year, so I was kind of expecting that anyway. I got a MIM Fender Deluxe Strat from Sweetwater a few years ago that was way worse than this guitar, so this issue isn’t confined to cheap guitars. I spent 15 minutes or so taking the bite off them with a file.
I do not like the Grover locking tuners at all. Lots of slippage, at least initially. Some of that was just that I put new strings on and they had to stretch, but some of the slippage was clearly the tuners (you know the sound, I’m sure). The next time I restring it, I will probably install regular tuners, or maybe just string them with a wrap this time. I also noticed that the tuners are crooked (Figure 4). I noticed the same thing when looking at one of the 600 series, which was a turnoff for a $600 used guitar. That also informed my decision to go with the 300 series. It’s probably something I can adjust, but if I’m going to install new ones, it doesn’t matter.
 |
| Figure 4. Crooked tuners |
It comes with a Tusq nut, which I like. So far, no pings when tuning.
Regarding purely aesthetic stuff, I like the looks overall.
The arm contour is more of hard angle, not smooth contour like a Strat’s (Figure 5). I
don’t notice the feel, but I do notice the appearance a bit (but not when I’m
playing it, so I don’t care). I also hate stickers on my guitars (Figure 6). I’ll leave
the little decal that says PAC311H, but I removed the CE marking/Made In
Indonesia sticker (which came off easily after I warmed it up with a lighter)
and placed it on the inside of the control cavity backplate (Fig. 7). Nothing I need to keep, but can't hurt to hang onto it, I guess.
 |
| Figure 5. Contour is more of a hard angle |
 |
| Figure 6. Headstock sticker |
 |
| Figure 7. Relocated headstock sticker |
Takeaway: I like it, and I’m sure I’ll have a lot of fun with it – playing, tweaking, modding, etc. For a few hundred bucks, I can live with whatever I don’t like about this guitar (or cheaply and easily tweak what I don’t like). So although I wouldn’t recommend any guitar, let alone this one, at the new price (I think these are $420 as of this post), I paid $330 for this and I wouldn’t hesitate to recommend it at that price, albeit with the aforementioned caveats.


